Thursday, December 26, 2013

{Handmade} PRESERVED MEYER LEMONS

I started coming across recipes for preserved lemons awhile ago (on Pinterest of course) and knew I wanted to try my hand at making them one day. I had never eaten them before, but had seen them used in recipes on cooking shows and in my fancier cook books. Do you have fancy cook books too? You know, the ones where the recipes call for $10 chunks of illusive cheeses you have to do three loops through the deli and dairy sections to find...not that this has happened to me or anything you usually don't muster up enough courage to cook from unless it is a special occasion, your fancy-pants friend is coming to town, or you are feeling extra adventurous.


Well, when our dwarf Meyer lemon tree produced four lemons during the first season, (he wasn't even supposed to fruit until next year, the over achiever) I knew exactly how I wanted to savor these gems...preserved lemons! I skimmed through a recipe for preserved lemons for a basic game plan:

http://www.simplebites.net/spiced-preserved-lemons/ By Marisa @SimpleBites

Then went for it...


~~~~~~~~~~~~~~~~~~~~~~~PRESERVED LEMONS~~~~~~~~~~~~~~~~~~~~~~~

Materials:

1.5 pint size Mason jar 
4 Meyer Lemons, washed
5 tbs. white sea salt
25-30 black peppercorns


Procedure:

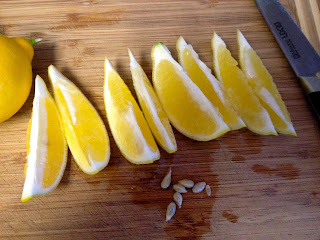
Slice lemons in half lengthwise, then slice each half in quarters lengthwise.

Add 1 tbs. salt to the bottom of the jar. Top with  8 lemon wedges & top with 1 tbs. salt. Repeat three more times, adding peppercorns halfway through.

Shake gently to get the juices flowing. Store in a cool, dry place for 2-3 weeks. Shake once or twice a day to mix the salt, peppercorns and lemon juice throughout. Open the jar lid every few days to allow gas pressure to escape. After 2-3 weeks, move jar to the fridge and you can start using. They will keep for up to a year.


Hypothesis: 

These preserved Meyer lemon slices will be delicious on top of fish before grilling or broiling, added to tuna and chicken salad, chopped up in couscous and quinoa, added to salad dressing, and more!

Results:

It is day three, and they are looking good so far:


{Handmade} New SLATHERlotions Product! PEPPERMINT ICE SCRUB


SLATHER PEPPERMINT ICE SCRUB

If you love peppermint as much as I do, you will l-o-v-e this scrub! Jojoba Oil mimics your natural skin oils, allowing it to soak in and deeply moisturize skin. It's packed with minerals & antioxidants from Cranberry Seed Oil, Pink Himalayan Sea Salt and Vitamin E. Fine Organic Cane Sugar is light as snow--keeping this scrub powerful, but gentle. Great as a lip/face scrub, body scrub, or added to bath water for a nourishing and skin softening soak!

Monday, August 5, 2013

{Handmade} VEGETABLE SPRING ROLLS

A perfect summertime lunch...and easy to personalize to your own taste. I used a mix of veggies on-hand and ramen noodles, but you can use whatever you like. For boosted protein, you can also add tofu, edamame, or meat of choice. Even shrimp if you like! If using meat, it is best to slice it thinly or the rolls become difficult to assemble and eat.

This was my first time using rice papers and it was as challenging as I expected when the first couple wrappers ended up stuck together in a gooey blob easier than I thought it would be. Not soaking the wrappers for more than five seconds and to slowly stretch them out flat on the plate for roll assembly in one try if possible. If the wrappers get folded and scrunched, they are difficult to get flat without ripping.


~~~~~~~~~~~~~~~~~VEGETABLE SPRING ROLLS~~~~~~~~~~~~~~~~~

Materials:

rice papers
1.5-2oz Ramen noodles - boiled & rinsed; cooled
3-4 leaves leaf lettuce
0.5 cucumber, cut in strips
1 carrot, grated
2 scallions, sliced
0.5 red bell pepper, cut in strips
5 leaves mint, minced

Procedure: 


FIll a bowl/casserole dish with a couple inches of warm water. One at a time, immerse a rice paper into the water for five seconds. Slowly stretch out so the wrapper doesn't fold as you remove from water onto a plate. 

Top one side of paper with veggies and noodles, leaving an inch border for rolling. Roll up like a burrito. Can be made a day in advance & refrigerated. Enjoy with dipping sauce of choice....I whipped up two different dipping delights:

Hoisin Peanut
2 tsp hoisin
0.5 tsp soy
0.5 tsp water
grated carrot & chopped peanuts for topping

Almond Sesame
2 tsp almond butter 
0.5 tsp soy
0.5 tsp water
0.25 tsp honey
0.25 tsp sesame oil
sesame seeds for topping

Discussion/Conclusion:

These spring rolls are quick, easy and delish! They kept well in the fridge overnight too. A great way to get more veggies in your diet or o use up some veggies you have laying around. I will definitely make these again and experiment with different filling combinations.

Tuesday, June 11, 2013

{Handmade} INFUSED BOTANICAL WATERS


I absolutely love my SLATHER SPA line... please check the lovelies out online slatherlotions.com if you haven't already! Right now SLATHER SPA comes in Lemon Green Tea Lavender, but more are in the works. I love these lotions because they...

photo (42).jpg

   1) Are one of my mad-scientist creations.
   2) Come in pretty blue bottles with pretty plants on the label.
   3) Have Coconut Oil & Avocado Oil & lots of Shea Butter.
   4) Scent is from pure essential oils.
   5) Are blended using infused botanical waters as a base.

Infused botanical water as a lotion base is very nourishing to the skin because you get all the vitamins, minerals and nutrients from the plant you have infused in each drop of lotion. Plus, it gives the lotions a slight natural, plant derived color besides white.

My first step is making the infused botanical waters...

~~~~~~~~~~~~~HOW TO MAKE INFUSED BOTANICAL WATER~~~~~~~~~~~~~

Materials:

Plant you would like to make infused water with (used lavender & hibiscus flowers)
Filtered Water
Large Glass Beaker or Measuring Cup
Fine-mesh Strainer
Water Bath (Metal high-sided pan filled with a few inches of water)
Hot Plate or Burner

Procedure:

It's just like making tea...


Wash plants or buy sterilized. Add to water in glass measuring cup. Heat using water bath until just simmering. Allow plant color & nutrients to infuse into water for 10-15 minutes. Turn off heat, strain out plant bits and cool water. You have just made infused botanical water!

Discussion:

Infused botanical waters are great for more than lotion base. You can use them after cleansing your face as a tonic. They can be added to bath water for a calming & cleaning soak. If made really concentrated, they can also be used as a natural perfume.
     Let me know if you think of other uses!


Lavender Flower Water is the base for SLATHER SPA in Lavender.
Green Tea Water is the base for SLATHER SPA in Lemon Green Tea.
I haven't found the perfect essential oil to pair with Hibiscus Flower Water yet for a new SLATHER SPA...I'd like to do a Vanilla or Honey for something ultra feminine.
      What do you think is a good pairing for Hibiscus?

I think Chamomile and/or Calendula will be my next infused water experiments!


Tuesday, April 16, 2013

{Handmade} GIARDINIERA for CANNING

Homemade Giardiniera....yum!

I am new to the wonderful world of canning and have so much fun making homemade versions of canned and pickled foods that I love. I don't know why I hadn't tried giardiniera earlier on in my life. I always have a hard time spelling & pronouncing it and still do not know if I am pronouncing correctly. I was anti-pepper and cauliflower up until a couple years ago. I have always loved pickles, but I was a pickle purist and didn't see how any pickled food could be better than pickled cucumbers. Again, why? Oh well...no use pondering all the delicious pickled yum-yums I've passed on over the years. Instead, I choose to make & eat more of it now!

Below is my first giardiniera experiment. I researched a  peck of pickled peppers bunch of different types and methods & combined my findings to create....duh da da daah....the perfect homemade giardiniera!! At least I hope it is...you have to let it sit at least two weeks before inhaling eating. For now, the lovelies are just sitting pretty on my counter smiling at me. What? Veggies can totally smile. I will add comments in a couple weeks so you all know the results.


~~~~~~~~~~~~~~~~~~ GIARDINIERA for CANNING ~~~~~~~~~~~~~~~~~~

Portion sits overnight, but active prep & cooking takes about 1 hour. Yields 6 pints. Keeps up to 1 year.

Materials:

Veggies

2 English cucumbers, sliced in rings & quartered

4 stalks celery, sliced on a diagonal        

2 large carrots, peeled & thinly sliced

0.50 head cauliflower, cored & chunked in small bite-size bits

0.5 bag sweet bell peppers, seeded & sliced in rings 
          (alternatively, you can use 1lb mixed bell peppers)

2 each red (Fresno) & green jalapenos, sliced in half-rings......
          To seed or not to seed?! I left the seeds & membranes in the Fresnos and in 1 jalapeno,   
             but seeded the other jalapeno. It's up to your taste-buds how hot you like it.

0.25 large sweet onion, sliced

Pickling Liquid

1 c. each Cider, White Wine & Red Wine Vinegars

3 c. water 

2 tbs. + 1 tbs. sea salt

1 tsp. red chili flakes


Additional Jar Fixings

black peppercorns

6 bay leaves

1 head garlic, separated out & peeled

6 sprigs oregano or marjoram......whichever is more to your liking


olive oil and/or chili oil


Procedure:


Day 1 - Add cucumber and celery slices to a big glass bowl. Add enough cold water to cover and 2 tbs. sea salt. Stir to combine. Refrigerate overnight.

Day 2 - Drain cucumbers and celery. Rinse really well and drain again. Add other veggies to bowl and mix gently to combine.

Wash and sterilize 6 pint jars (I used wide-mouth). Heat vinegars, water, and additional 
1 tbs. sea salt over medium heat until just boiling. Crush red chili flakes in the palm of your hand as you add and stir well. 

When you are ready to fill, add a few pinches peppercorns, bay leaf, 3 garlic cloves and a sprig of oregano or marjoram to the bottom of each jar.  Pack each with the veggie mixture to the top of the jar's neck (about 0.5in from the top rim of jar). Next, ladle in the hot pickling liquid until veggies are covered, leaving 0.5in head space. Add a tbs. of olive oil or chili oil to the top of each. 

Remove air bubbles by slidding a chopstick between the veggies and jar and pulling towards the center slightly. Repeat around the circumference of the jar. Add lid and twist on ring until just fingertip tight. Process for 10 minutes (I had to do 3 batches of 2 for the size of my basket. Carefully remove jars and avoid tipping as you scream when the handle comes of your basket and you burn your hand saving a jar from falling and smashing on the tile and flinging broken glass and pickeled veggie lava all over you set on a towel on the counter. Keep  spaced out and undisturbed to cool overnight. 

After 24hrs, check that that all have sealed properly. If so, store for a minimum of 2 weeks and up to one year.  Refrigerate for a couple days before eating. If any did not seal properly, put them in the fridge and eat within a couple weeks.


Hypothesis:

The perfect homemade canned giardiniera has just been created. 


Results:

To be determined...